Friday, March 26, 2010

Chocolate Chip Angel Food Cake

Let's Bake!

That's the thought I had a few days ago, as I hadn't baked in a while. So I found a HEALTHY dessert - chocolate chip angel food cake. Sounds delish - right??? So I took one for the team (aka, my 5 readers) and tried it out.

----------

Chocolate Chip Angel Food Cake

Ingredients
- 1 box (1 lb) white angel food cake mix
- Water called for on cake mix box
- 1/2 cup miniature semisweet chocolate chips

Directions
- Move oven rack to lowest position (remove other racks).
- Heat oven to 350°F.
- Make cake mix as directed on box
- Pour into pan
- Top mix off with chocolate chips
- Bake, cool and remove from pan as directed.

----------


<----- After I had some


<----- Piece from the top, and piece upside down (to see the choc chips)


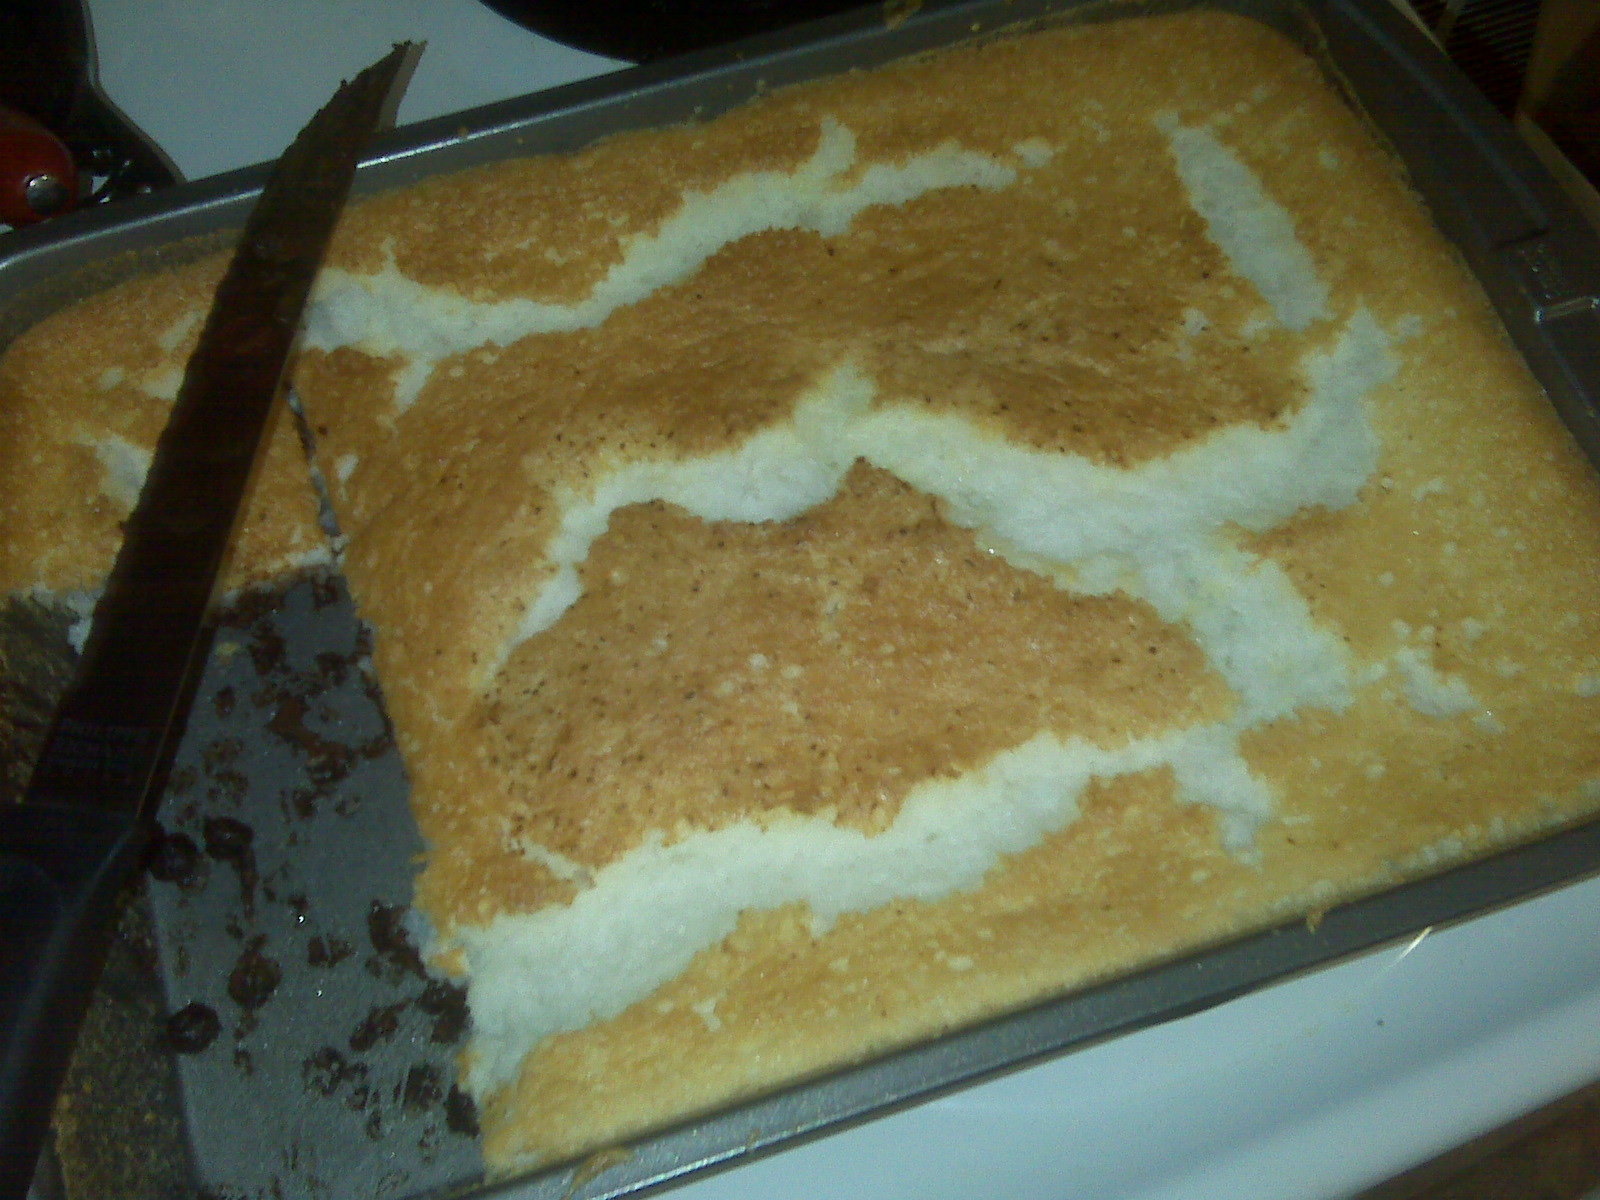
Ok, while this was SUPER easy to make - it didn't come out like it was supposed to.

First off - USE A BIG BOWL, once you mix the mix, it fluffs up...ALOT. I put the chocolate chips in once the mix was in the pan (I had read reviews of the chips sinking if you mix it in WITH the mix - hence why I changed the dir above) but all the chocolate chips still sunk to the bottom :(. I also put in a whole bag of the chips, instead of just a cup - I can't help it, I like chocolate.

I was also afraid it was going to burn so I took it out 5 min early. It didn't hurt it at all, but the bottom wasn't fully cooked. It ended up turning out tasty, but a little messy.

I wish the chips wouldn't have sunk to the bottom of the mix - OR I had the correct "Angel food cake pan" instead of a brownie pan. Oh well.

Oh, and did I mention...IT'S LOW FAT!! SO EAT AWAY!!! (and let me know if you solve the sinking chips problem).

I hope I can get my next baking recipe (whatever it may be) to come out perfect! Maybe I'll just make some cookies.

Enjoy! - apes -

Zesty Spinach-Lemon Salad

My friend (and blog follower) Sara K. hit me up with a recipe that is her FAV, and that she thought I'd like. So of COURSE I tried it.

----------

Zesty Spinach-Lemon Salad (I made the name myself - I was calling it "Sara K. Salad)

Ingredients
- 1 box tri color rotini pasta (any pasta works, this is just the prettiest)
- 1 bag spinach shredded (as much as you like, i just get the bags with the bag salad in the produce section)
- 1 plastic box full cherry tomatoes halved or quartered
- 1 whole medium lemon rind
- splash of olive oil (don't go to heavy or it gets greasy)

Directions
- Boil the noodles as directed
- Pour hot noodles over spinach and let it sit a minute to wilt the spinach
- Add in the tomatoes, lemon and olive oil and mix

----------
According to Sara you can serve it warm or cold, entree or side dish.

I made it last night, and it turned out tasty. However, I realized I used a LOT of lemon rind, so the pasta was super zesty (word of the day?)! I was curious while making it where the flavor would come from, DEF from the lemon! I had it as a side, with Pork Chops as my main dish. I had plenty left over (I made the whole pasta box) so I brought it for lunch today.

I think if you add some tuna it'll give it a little diff flavor, but still a great taste!

This is perfect for summer/spring to take anywhere (cookout, bbq, friends potluck, nowhere) to share with friends (or keep to yourself). It makes a lot, and is different from the usual pasta salad - so try it out at your next potluck/cookout!

On a side note: every time I see the lemon rind shavings I think it's cheese, but once I take a bite, my mouth realizes its not! Tricky Lemon Rinds!!!

Thanks for the recipe Sara!!

Enjoy! - apes -

PS - If you haven't yet...click on the "become a follower" button and show me your support! (no registration for blogger is required).

Friday, March 19, 2010

Toasted Vegetable Tacos

Recently my Godmother checked out my blog and said she wanted to make the black bean bagel sandwich for my cousin (who is vegetarian), and if I come across any more recipes to let her know. So this one's for you Aunt Cathy (and Lauren)!

----------

Toasted Vegetable Tacos my modified recipe in pink

Ingredients:
- 1/2 to 1 cup chopped fresh vegetables, such as broccoli, snap peas, green beans and red bell pepper I used steam fresh frozen southwestern corn, broccoli pieces, snap peas and fresh red bell pepper.
- 1 flour tortilla (8 inch)
- 1 teaspoon raspberry chipotle sauce I used Mrs. Dash southwestern chipotle marinade
- 1 tablespoon shredded Mexican 4-cheese blend
- I added a package of Old El Paso instant rice: Fiesta Flavor

Directions:
- Place vegetables in a microwavable bowl. Cover with plastic wrap and microwave on High 1 minute or until tender-crisp. I did this with my red bell pepper, but since the rest of my veggies mine were frozen, I microwaved them as their directions said, then mixed all the vegetables and rice in a bowl.
- Heat medium skillet over medium heat. Toast tortilla about 1 minute on each side or until toasted. Carefully bend tortilla until edges meet but do not fold.
- Spread chipotle sauce (marinade) on tortilla.
- Top with vegetables and sprinkle with cheese. I forgot about the cheese.

----------

So these turned out VERY tasty (even with my modifications), with one exception - the rice! I forgot I don't like the microwavable rice to begin with and I still don't. I should have used plain/brown rice and made it normally and added it to the veggies.

Using the chipotle marinade was a good substitute, and tasted GREAT!

The vegetables made a TON of "filling" so I brought the rest to work to eat, and I can eat it like a veggie salad if I don't want to use a soft taco shell.

So Aunt Cathy, if you try these, I hope you and Lauren enjoy them (after all, it should fit in well with the food in AZ)!

Enjoy! - apes -

Friday, March 12, 2010

Grasshopper Bars

Enjoy those minty grasshopper cookies?? Who doesn't (well, besides people that don't like fun)?!?!? I was looking for a dessert recipe to take to my grandparents going away party (they are moving from VA to FL) this weekend, and I came across this recipe. I looked it over and thought THESE LOOK SO GOOD! So I decided to try it out! Plus, since the frosting is green, it's all ready for St. Patty's day!!
-----

Grasshopper Bars

Ingredients:
Bars
- 1 pouch (1 lb 1.5 oz) Betty Corcker double choc. chunk cookie mix - 1/3 cup vegetable oil
- 2 tablespoons water
- 1 egg
Frosting
- 3 cups powdered sugar
- 1 package (3 oz) cream cheese, softened
- 1/4 cup butter, softened
- 2 tablespoons milk
- 1/4 teaspoon mint extract
- 3 to 4 drops green food color
Glaze
- 1 oz unsweetened baking chocolate (as in the chocolate baking bars)
- 1 tablespoon butter

Directions:
- Heat oven to 350°F. Spray bottom of 13x9-inch pan with cooking spray.
- In large bowl, stir all Bar ingredients until soft dough forms.
- Press into pan; bake 15 minutes.
- Cool about 10 minutes.
- In large bowl, stir all Frosting ingredients until smooth.
- Spread over bars.
- In small microwavable bowl, microwave all Glaze ingredients on High 30 seconds; stir until smooth.
- Drizzle over frosting.
- Refrigerate 30 minutes or until set.
- For bars, cut into 9 rows by 4 rows.
- Store covered in refrigerator.

-----

These were simple to make, and while I haven't had a chance to eat one YET - I have tasted the icing, and it is DELICIOUS! Not too minty, and will be PERFECT with chocolate!

The only problems I came across was with the frosting and the glaze:
  • It was taking forever to stir the frosting, so not all the cream cheese was blended. I am sure I could have blended all of it super smooth if I had used a mixer.
  • The glaze was supposed to be "drizzled" over the frosting, but it didn't really drizzle well (might have been the bowl I was using to drizzle though) so i just dropped some of the melted chocolate on the frosting, then used a sharp knife to give it the design. I just pulled the knife through the top layer, just deep enough to move the chocolate. I did this repeatedly until the chocolate was spread out.

I am sure no one at my grandparents party are expecting me to even be at the party, let along bring something, so I can't wait to surprise them with my new skill (ok, maybe not skill, just a hobby).

Try it out, and tell me what you think!

Enjoy! - apes -

Monday, March 8, 2010

Congrats A.Jones!!!

So my girl got into grad school at JMU!! WOO HOO ASHLEY!!!! Who is this girl you ask - go here to get acquainted: http://www.ashleyjonesy.blogspot.com/

Anyways, so she got into grad school and had previously asked me to make her some Oreo Balls. I decided this would be the PERFECT time to do so. I planned on making them JMU "purple and gold". Key word = PLANNED.

So I hop over to the grocery store (I am sure the workers there totally recognize me in the baking aisle by this point) and pick up the ingredients - for the gold balls I picked up some butterscotch chips, and for purple I was going to use white choc chips with purple food coloring.

Ok, back home and time to make them (here comes the side story)....

I just got a netbook with a web cam, so I decided to try out Skype. I got on, and my friend Kevin found me, so we skype'd (video-chatted) while I crushed up the oreos. Then he decided to just come over (he lives down the street). So he came over and munched on the oreos while I mixed them up with the cream cheese. While they were in the freezer I introduced him to chatroulette (hil-a-ri-ous!!!) and we had lunch. Then came the oreo coating time!

We melted the butterscotch, those came out fine. Then it was the purple time! I mixed up the food coloring (red + blue = purple, for you non-art people). I melted the white chocolate...and then it was time to add the food coloring mix....

Note: last time when i tried to add straight red coloring (for the vday ones) the chocolate got hard and was hard to use.

I poured some of the purple color into the chocolate...and it happened. The chocolate hardened. So there went a whole bag of white chocolate. UGH!!! REALLY?!?!?!?!

In the end, instead of purple and gold oreo balls, AJ got butterscotch and plain ones. She said she still liked them...but you know those grad school types...you just can't trust'em.

Moral of the story - DON'T MIX ANY COLORING INTO MELTED CHOCOLATE!

- apes -

Friday, March 5, 2010

Pina Colada Cake

After the boys had my Black Bean Bagel Sandwiches, I also provided them with dessert! It's hard to find an actually healthy, good tasting dessert that isn't fruit and yogurt. And that's not really dessert is it? NO! So I hunted around for a decently easy and quite tasty one..and then I found it....PINA COLADA CAKE! Whoa...you mean a pina colada turned into a cake? SIGN ME UP!!!! So I wrote down the recipe, and ran to the store. It took me 2 dishes (1 to cook, 1 to bake), and 1 mixing spoon to make it. Oh yeah, and like 25 min from start to pulling out of the oven. So here goes....

-----

Pina Colada Cake

Ingredients:
- 1 package (14 1/2 oz) angel food cake mix
- 1 can (20 oz) unsweetened crushed pineapple
- 8 oz fat-free frozen whipped topping, thawed
- 1/2 cup (2 oz) toasted coconut

Directions:
- Heat oven to 350°F. Spray a 13x9-inch baking dish with cooking spray.
- In large bowl, stir together cake mix and pineapple. Pour into prepared baking dish.
- Bake 20 minutes or until toothpick inserted in center comes out almost clean. Cool completely on a rack.
- Spread whipped topping over cake. Sprinkle with coconut. Cover and refrigerate until ready to serve.

-----


<---We already ate some before I remembered to snap a pic.


<--- Look how light and fluffy it is!


I kept the coconut sprinkles off of it because the guys aren't fans of coconut. But I put some on mine and I loved it! It's easiest the most simple cake I have EVER made! So if you are inviting me to some kind of potluck in the near future - this is probably what I'll be bringing. I brought in a piece to a co-worker (who doesn't even like pineapple) and she loved it! This one is DEF going into my box of keepers - and probably will be my dessert of choice when I get back into hardcore marathon training. After all - it IS healthy (I even used low-fat cool whip!) and will still calm my perma-sweet tooth.

Enjoy! - apes -

Black Bean Bagel Sandwich

Yesterday I was exploring some healthy food sites online and I came across a recipe for a Black Bean Bagel Sandwich. After looking at the ingredients, I realized it was easy enough for me! I read the 2 reviews on it, and 1 was good while the other was bad. I was a little worried about it not turning out ok, so I made sure I was EXTRA attentive with the already super-easy recipe.

So I called the fellas (Leo and Drew) and had them over to help me test out the new recipe.

-----

Black Bean Bagel Sandwich

Ingredients:
- 1 can (15 oz) Progresso black beans, drained, rinsed
- 1/3 cup chunky-style salsa
- 1/4 teaspoon ground cumin or chili powder
- 4 bagels, cut horizontally in half
- 2 plum (Roma) tomatoes, sliced
- Lettuce leaves

Directions:
- In food processor or blender, process beans, salsa and cumin until smooth.
- Spread 1/4 cup bean mixture over each of 4 bagel halves.
- Top with tomato, lettuce and remaining bagel halves.

-----

Easy, right? YOU HAVE NO IDEA! Instead of Progresso Black Beans, I got regular generic black beans (my store didn't have progresso!), and I opted for chili powder for more taste. I put the ingredients in the blender (making sure I drained and rinsed the beans first) for a few seconds, but didn't blend it all the way because I didn't want to turn it into a full on mush. Then I heated the (multi-grain) bagels to make them warm.

It ended up being a healthier (vegetarian) kind of sloppy joe. It wasn't too sloppy either though, but you get the point.

(not the best pic, but it did taste good!)

Once it was all served up, the boys seemed to like it, Leo even had 2 sandwiches! It didn't look like it made a lot, but we got 5 bagel sandwiches out of it! We realized we could add cheese and it would still be good, but I didn't have any already sliced on hand.

This dinner probably cost me like $5 to make (even cheaper because I already had some of the ingredients) - and was easy enough that I can make it in a rush.

Enjoy! - apes -

Wednesday, March 3, 2010

Fish Packets (& Leftovers)

Growing up, everyone had their "favorite dish". Sometimes is was homeade pizza (mmm the chef boyardee kind), or homade chicken soup, etc. Well when I was at the age where I was discovering I liked more than just mac-n-cheese and burger king, my mom would OCCASIONALLY ask what I wanted for dinner. I would always tell her I wanted "fish packets" - it's this SUPER easy meal she would make on occasion, and I would eat at least 2 of them. They never filled me up, but they were always my favorite meal made by her.

So now that I am older, living on my own and cooking for myself I usually make this meal at least once a week. It's SUPER easy (and cheap). So easy in fact, I am not even putting it in recipe form.

Get some packaged fish from the store (tilapia, salmon, etc) and put it (defrosted) on some aluminum foil. Then take any vegetables you like (cut up) and put them with the fish. I usually use onions, peppers, and summer squash. You can also do carrots, tomatoes, etc. Pretty much if you like it, then try it. Then season it as you prefer. My mom used to just use salt, pepper, and spray butter. When I made it this week I used fresh Arizona lemons** over the fish, then some vegetable seasoning, and salt and pepper. Close up the aluminium foil around the fish and veggies (taste best if they are in the same foil pack) so it makes a "fish packet" of food. Then put it in the oven for about 20 min or so, around 400 degrees.
Once done, let it cool - and dig in!

I had extra veggies this past week when I was making it so I made a full fish/veggie packet, then another packet of just veggies. I cooked up some rice and mixed it with the veggie packet and had it for lunch the next day! **My Godmother out in Arizona sent me a box of fresh grapefruits, lemons, and tangelos from her garden.

Enjoy! - apes -

Monday, March 1, 2010

Smore's Balls

With the Oreo Balls being SUCH a HUGE hit, I wanted to try out different cookies that would also turn out well. After some though, I thought about SMORE's! While they aren't cookies, they are still awesome, and eating them in a ball - SWEETNESS! So I checked online for a recipe in case I needed to do anything different with these ingredients. Nope! So here's how to do it:

-----

Smore's Balls

Ingredients:
- 1 bag of chocolate chips morsels
- 1 jar of melted marshmallows (Fluff)
- 1 pack of graham crackers (crushed up)

Directions:
- Melt the chocolate chip morsels in the microwave (30-40 sec at a time, stir then repeat)
- Slowly add the fluff to the chocolate, making sure to mix it well
- Once mixed, let cool for a few minutes
- Spray a cookie tray and sprinkle the graham crackers onto the pan (feel free to put some crumbs in the mix of chocolate chips and marshmallows
- Once mix is cooled, roll into balls and roll through the graham cracker crumbs
- Either eat at room temp or eat them cold

-----
Now when I made them, they didn't turn out as good as the Oreo balls, but they were still good. They tasted more chocolate-y than anything else, so if I make them again I might put in more marshmallow (fluff).

But hopefully you try it, and like it!

Enjoy! - apes -